Using the Interactive Scene — Isaac Lab Documentation
Title: Using the Interactive Scene — Isaac Lab Documentation
URL Source: https://isaac-sim.github.io/IsaacLab/main/source/tutorials/02_scene/create_scene.html
Published Time: Thu, 11 Sep 2025 17:00:56 GMT
Markdown Content: Using the Interactive Scene#
So far in the tutorials, we manually spawned assets into the simulation and created object instances to interact with them. However, as the complexity of the scene increases, it becomes tedious to perform these tasks manually. In this tutorial, we will introduce the scene.InteractiveScene class, which provides a convenient interface for spawning prims and managing them in the simulation.
At a high-level, the interactive scene is a collection of scene entities. Each entity can be either a non-interactive prim (e.g. ground plane, light source), an interactive prim (e.g. articulation, rigid object), or a sensor (e.g. camera, lidar). The interactive scene provides a convenient interface for spawning these entities and managing them in the simulation.
Compared the manual approach, it provides the following benefits:
-
Alleviates the user needing to spawn each asset separately as this is handled implicitly.
-
Enables user-friendly cloning of scene prims for multiple environments.
-
Collects all the scene entities into a single object, which makes them easier to manage.
In this tutorial, we take the cartpole example from the Interacting with an articulation tutorial and replace the design_scene function with an scene.InteractiveScene object. While it may seem like overkill to use the interactive scene for this simple example, it will become more useful in the future as more assets and sensors are added to the scene.
The Code#
This tutorial corresponds to the create_scene.py script within scripts/tutorials/02_scene.
1# Copyright (c) 2022-2025, The Isaac Lab Project Developers (https://github.com/isaac-sim/IsaacLab/blob/main/CONTRIBUTORS.md). 2# All rights reserved. 3# 4# SPDX-License-Identifier: BSD-3-Clause 5 6"""This script demonstrates how to use the interactive scene interface to setup a scene with multiple prims. 7 8.. code-block:: bash 9 10 # Usage 11 ./isaaclab.sh -p scripts/tutorials/02_scene/create_scene.py --num_envs 32 12 13""" 14 15"""Launch Isaac Sim Simulator first.""" 16 17 18import argparse 19 20from isaaclab.app import AppLauncher 21 22# add argparse arguments 23parser = argparse.ArgumentParser(description="Tutorial on using the interactive scene interface.") 24parser.add_argument("--num_envs", type=int, default=2, help="Number of environments to spawn.") 25# append AppLauncher cli args 26AppLauncher.add_app_launcher_args(parser) 27# parse the arguments 28args_cli = parser.parse_args() 29 30# launch omniverse app 31app_launcher = AppLauncher(args_cli) 32simulation_app = app_launcher.app 33 34"""Rest everything follows.""" 35 36import torch 37 38import isaaclab.sim as sim_utils 39from isaaclab.assets import ArticulationCfg, AssetBaseCfg 40from isaaclab.scene import InteractiveScene, InteractiveSceneCfg 41from isaaclab.sim import SimulationContext 42from isaaclab.utils import configclass 43 44## 45# Pre-defined configs 46## 47from isaaclab_assets import CARTPOLE_CFG # isort:skip 48 49 50@configclass 51 class CartpoleSceneCfg(InteractiveSceneCfg): 52 """Configuration for a cart-pole scene.""" 53 54 # ground plane 55 ground = AssetBaseCfg(prim_path="/World/defaultGroundPlane", spawn=sim_utils.GroundPlaneCfg()) 56 57 # lights 58 dome_light = AssetBaseCfg( 59 prim_path="/World/Light", spawn=sim_utils.DomeLightCfg(intensity=3000.0, color=(0.75, 0.75, 0.75)) 60 ) 61 62 # articulation 63 cartpole: ArticulationCfg = CARTPOLE_CFG.replace(prim_path="{ENV_REGEX_NS}/Robot") 64 65 66def run_simulator(sim: sim_utils.SimulationContext, scene: InteractiveScene): 67 """Runs the simulation loop.""" 68 # Extract scene entities 69 # note: we only do this here for readability. 70 robot = scene["cartpole"] 71 # Define simulation stepping 72 sim_dt = sim.get_physics_dt() 73 count = 0 74 # Simulation loop 75 while simulation_app.is_running(): 76 # Reset 77 if count % 500 == 0: 78 # reset counter 79 count = 0 80 # reset the scene entities 81 # root state 82 # we offset the root state by the origin since the states are written in simulation world frame 83 # if this is not done, then the robots will be spawned at the (0, 0, 0) of the simulation world 84 root_state = robot.data.default_root_state.clone() 85 root_state[:, :3] += scene.env_origins 86 robot.write_root_pose_to_sim(root_state[:, :7]) 87 robot.write_root_velocity_to_sim(root_state[:, 7:]) 88 # set joint positions with some noise 89 joint_pos, joint_vel = robot.data.default_joint_pos.clone(), robot.data.default_joint_vel.clone() 90 joint_pos += torch.rand_like(joint_pos) * 0.1 91 robot.write_joint_state_to_sim(joint_pos, joint_vel) 92 # clear internal buffers 93 scene.reset() 94 print("[INFO]: Resetting robot state...") 95 # Apply random action 96 # -- generate random joint efforts 97 efforts = torch.randn_like(robot.data.joint_pos) * 5.0 98 # -- apply action to the robot 99 robot.set_joint_effort_target(efforts)100 # -- write data to sim101 scene.write_data_to_sim() 102 # Perform step 103 sim.step() 104 # Increment counter 105 count += 1106 # Update buffers107 scene.update(sim_dt) 108 109 110def main(): 111 """Main function.""" 112 # Load kit helper 113 sim_cfg = sim_utils.SimulationCfg(device=args_cli.device) 114 sim = SimulationContext(sim_cfg) 115 # Set main camera 116 sim.set_camera_view([2.5, 0.0, 4.0], [0.0, 0.0, 2.0])117 # Design scene118 scene_cfg = CartpoleSceneCfg(num_envs=args_cli.num_envs, env_spacing=2.0)119 scene = InteractiveScene(scene_cfg) 120 # Play the simulator 121 sim.reset() 122 # Now we are ready! 123 print("[INFO]: Setup complete...") 124 # Run the simulator 125 run_simulator(sim, scene) 126 127 128if name == "main": 129 # run the main function 130 main() 131 # close sim app 132 simulation_app.close()
The Code Explained#
While the code is similar to the previous tutorial, there are a few key differences that we will go over in detail.
Scene configuration#
The scene is composed of a collection of entities, each with their own configuration. These are specified in a configuration class that inherits from scene.InteractiveSceneCfg. The configuration class is then passed to the scene.InteractiveScene constructor to create the scene.
For the cartpole example, we specify the same scene as in the previous tutorial, but list them now in the configuration class CartpoleSceneCfg instead of manually spawning them.
@configclass class CartpoleSceneCfg(InteractiveSceneCfg): """Configuration for a cart-pole scene."""
# ground plane
ground = AssetBaseCfg(prim_path="/World/defaultGroundPlane", spawn=sim_utils.GroundPlaneCfg())

# lights
dome_light = AssetBaseCfg(
    prim_path="/World/Light", spawn=sim_utils.DomeLightCfg(intensity=3000.0, color=(0.75, 0.75, 0.75))
)

# articulation
cartpole: ArticulationCfg = CARTPOLE_CFG.replace(prim_path="{ENV_REGEX_NS}/Robot")
The variable names in the configuration class are used as keys to access the corresponding entity from the scene.InteractiveScene object. For example, the cartpole can be accessed via scene["cartpole"]. However, we will get to that later. First, let’s look at how individual scene entities are configured.
Similar to how a rigid object and articulation were configured in the previous tutorials, the configurations are specified using a configuration class. However, there is a key difference between the configurations for the ground plane and light source and the configuration for the cartpole. The ground plane and light source are non-interactive prims, while the cartpole is an interactive prim. This distinction is reflected in the configuration classes used to specify them. The configurations for the ground plane and light source are specified using an instance of the assets.AssetBaseCfg class while the cartpole is configured using an instance of the assets.ArticulationCfg. Anything that is not an interactive prim (i.e., neither an asset nor a sensor) is not handled by the scene during simulation steps.
Another key difference to note is in the specification of the prim paths for the different prims:
-
Ground plane:
/World/defaultGroundPlane -
Light source:
/World/Light -
Cartpole:
{ENV_REGEX_NS}/Robot
As we learned earlier, Omniverse creates a graph of prims in the USD stage. The prim paths are used to specify the location of the prim in the graph. The ground plane and light source are specified using absolute paths, while the cartpole is specified using a relative path. The relative path is specified using the ENV_REGEX_NS variable, which is a special variable that is replaced with the environment name during scene creation. Any entity that has the ENV_REGEX_NS variable in its prim path will be cloned for each environment. This path is replaced by the scene object with /World/envs/env_{i} where i is the environment index.
Scene instantiation#
Unlike before where we called the design_scene function to create the scene, we now create an instance of the scene.InteractiveScene class and pass in the configuration object to its constructor. While creating the configuration instance of CartpoleSceneCfg we specify how many environment copies we want to create using the num_envs argument. This will be used to clone the scene for each environment.
# Design scene
scene_cfg = CartpoleSceneCfg(num_envs=args_cli.num_envs, env_spacing=2.0)
scene = InteractiveScene(scene_cfg)
Accessing scene elements#
Similar to how entities were accessed from a dictionary in the previous tutorials, the scene elements can be accessed from the InteractiveScene object using the [] operator. The operator takes in a string key and returns the corresponding entity. The key is specified through the configuration class for each entity. For example, the cartpole is specified using the key "cartpole" in the configuration class.
# Extract scene entities
# note: we only do this here for readability.
robot = scene["cartpole"]
Running the simulation loop#
The rest of the script looks similar to previous scripts that interfaced with assets.Articulation, with a few small differences in the methods called:
-
assets.Articulation.reset()⟶scene.InteractiveScene.reset() -
assets.Articulation.write_data_to_sim()⟶scene.InteractiveScene.write_data_to_sim() -
assets.Articulation.update()⟶scene.InteractiveScene.update()
Under the hood, the methods of scene.InteractiveScene call the corresponding methods of the entities in the scene.
The Code Execution#
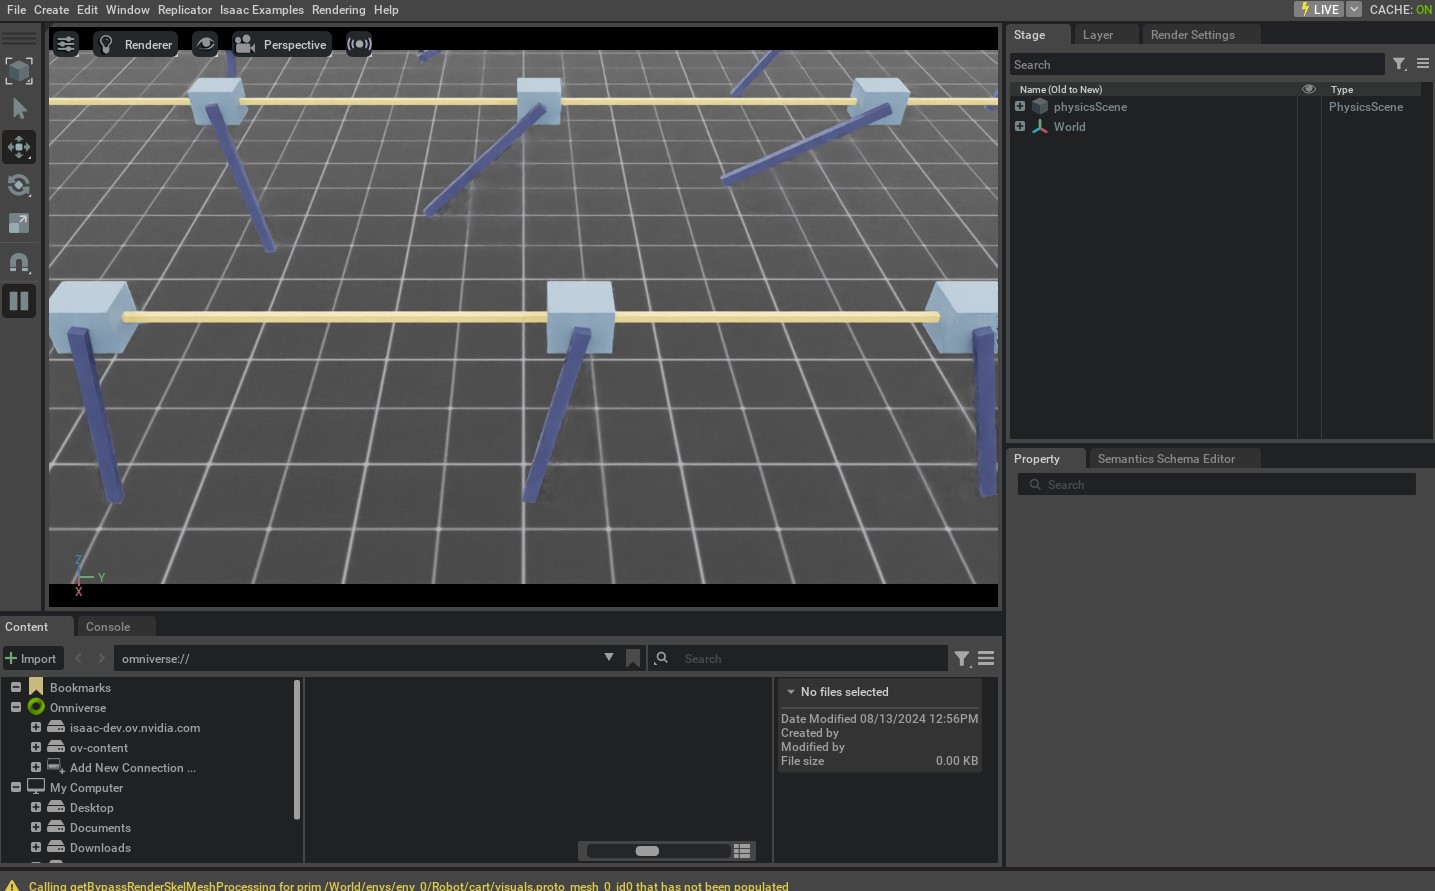
Let’s run the script to simulate 32 cartpoles in the scene. We can do this by passing the --num_envs argument to the script.
./isaaclab.sh -p scripts/tutorials/02_scene/create_scene.py --num_envs 32
This should open a stage with 32 cartpoles swinging around randomly. You can use the mouse to rotate the camera and the arrow keys to move around the scene.
 In this tutorial, we saw how to use
 scene.InteractiveScene to create a scene with multiple assets. We also saw how to use the num_envs argument to clone the scene for multiple environments.
There are many more example usages of the scene.InteractiveSceneCfg in the tasks found under the isaaclab_tasks extension. Please check out the source code to see how they are used for more complex scenes.
Links/Buttons:
- #
- scene.InteractiveScene
- Interacting with an articulation
- scene.InteractiveSceneCfg
- assets.AssetBaseCfg
- assets.ArticulationCfg
- assets.Articulation
- assets.Articulation.reset()
- scene.InteractiveScene.reset()
- assets.Articulation.write_data_to_sim()
- scene.InteractiveScene.write_data_to_sim()
- assets.Articulation.update()
- scene.InteractiveScene.update()